It is comforting, inviting, welcoming, appetizing, enticing, warm, hearty, wholesome, cozy and is filled with the promise of nourishment to come. The aroma of fresh baked bread. We can think of no scent that promises (and almost always delivers) more.
Good, quality loaves of homemade bread require four vital ingredients: fresh yeast, flour, liquid and patience.
(A little salt and sugar certainly won’t hurt.)
Yeast is of the utmost importance.
Remember, yeast is a living thing and should be treated with care. The single-cell organisms can withstand extreme cold (we keep our yeast in the freezer for optimum freshness), but even brief exposure to heat at the wrong time can kill it and yeast stored at room temperature can be iffy. If you know your yeast is fresh and has been stored properly, there’s no need to “proof” it, but if you’re unsure, an easy way to test it is by dissolving it in warm liquid (no hotter than 120 degrees). If it gets bubbly and frothy after 5 to 10 minutes you’re good to go.
If not, throw it out and buy new yeast.
Nothing will bring yeast back from the dead.
All-purpose flour, bread flour and whole-wheat flour are all good options for bread baking. All-purpose flour and bread flour can be used interchangeably in many recipes with slightly differing results. Loaves made with bread flour tend to be chewier and sturdier than bread made with all-purpose flour. Dough made with bread flour may require a bit more liquid. Wholewheat flour, rye flour and pumpernickel flour can be swapped for some of the white flour in many recipes to alter the flavor and boost the nutritional value. If you want the added nutritional value of whole-wheat flour but not the darker color, white whole-wheat flour is a great option. However, to avoid dense, heavy loaves avoid using more than 50 percent whole-wheat flour, and 40 percent light rye or 20 percent pumpernickel flour, unless the recipe directs otherwise.
Decent gluten-free bread is possible, if you’re willing to spend the money on the necessary specialty flours, but don’t expect it to have the flavor and texture of bread made with wheat flour.
Liquid. Water, milk and beer are all excellent liquids for bread. Breads made with water tend to have crisper crusts and chewier crumbs (like French baguettes). Breads made with milk have tender crumbs and golden (and sometimes softer) crusts. Beer produces a flavorful loaf and is a good option when baking bread with dark wheat flours, as alcohol provides extra fuel for the yeast. Always follow the instructions with the recipe for the proper temperature to heat the liquid.
But a general rule of thumb is to heat liquids to 100 to 120 degrees.
Patience. Good bread takes time. Don’t rush the rise and don’t be tempted to use more yeast to speed things up. Additional yeast may make loftier loaves, but they won’t taste any better. The longer and slower the rise, the more flavorful the bread.
The following are some of our favorite yeast breads to make at home. And coincidentally, they all skip the arduous task of kneading.
This slightly sweet, slightly nutty loaf has been one of our favorite breads to make this winter. The loaf is well worth the long rising time. It is called breakfast bread, and it does make excellent toast, but this bread is good with any meal.
Maple Oat Breakfast Bread
5 cups all-purpose flour (see note)
1 ½ cups old fashioned oats
1/3 cup maple syrup
3 tablespoons melted butter
1 tablespoon olive oil
2 teaspoons salt
½ teaspoon active or instant yeast
2 ¼ cups room temperature water
Combine all of the ingredients in a large bowl and stir well (a couple of minutes) to combine into a tacky, messy dough. (I used a stand mixer.) Cover with plastic wrap or a kitchen towel and allow to rise at room temperature for 8 to 12 hours.
Gently scrape the dough onto a well floured surface and shape into a round or oblong loaf. Place the loaf on a well floured towel and allow to sit for an hour.
Meanwhile, heat oven to 450 degrees with a lidded 10-inch (about 8-quart) Dutch oven or baking crock in it. When the dough is ready and the oven is hot, turn the dough off of the towel into the hot Dutch oven and cover with the lid. Bake, covered, for 30 minutes, then remove the lid and continue to bake until the crust is deep brown, 15 to 20 minutes more.
Remove the bread from the oven, turn it out of the pot and allow to cool completely before slicing. Bread will keep, well wrapped, for about 5 days.
Makes 1 large loaf.
Note: Can use up to 2 cups whole-wheat flour.
Recipe adapted from a recipe by Emily Vikre (aka fiveandspice) at food52.com.
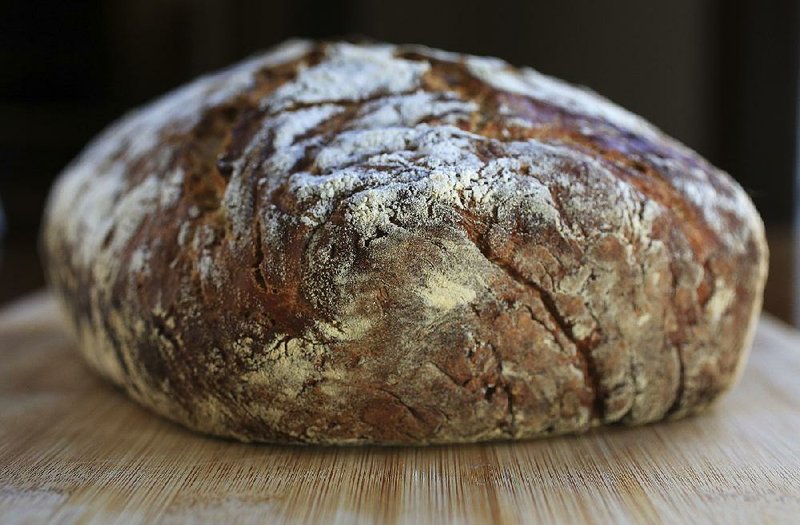
Keeping a batch of this dough on hand in the refrigerator lets bakers whip up a crusty loaf almost anytime. It makes delicious bread the day the dough is mixed, but the dough’s flavor will develop over time, giving the bread a sourdough-like flavor after a week or so.
Heating a metal pan in the oven and pouring hot water into it when you place the bread in the oven helps produce a crisp crust and tender crumb similar to professionally baked loaves. Skipping this step produces a still-delicious loaf, but with a softer crust.
Artisan Free-Form Loaf
3 cups lukewarm (100 degrees) water
1 tablespoon yeast (0.35 ounce)
1 to 1 ½ tablespoons kosher salt (0.6 to 0.9 ounce)
6 ½ cups all-purpose flour (2 pounds), plus more for dusting (see note)
Cornmeal for dusting, or parchment paper
In a 6-quart bowl, combine the water, yeast and salt and mix well. Add the flour all at once and mix with a wooden spoon or the paddle attachment on stand mixer until well blended and uniformly moist without any dry patches. If using a spoon and mixture becomes too difficult to stir, continue mixing with very wet hands, pressing the mixture together. Do not knead. The dough should be wet and loose.
Cover loosely with plastic wrap. Allow mixture to rise at room temperature for about 2 hours. Mixture will rise, then flatten or collapse. When this happens, transfer to the refrigerator. Once chilled, the dough is ready to use (chilling makes the dough easier to shape and handle); dough will keep, refrigerated, for up to 14 days.
To shape and bake:
Dust a cookie sheet (no rim) or pizza peel with cornmeal or line with parchment paper.
Lightly dust the surface of the refrigerated dough with flour.
Using your hands, reach in and pull up a portion of the dough and cut off a 1-pound piece (about the size of a grapefruit), using a serrated knife or kitchen shears. Hold the dough in one hand and sprinkle with a little more flour, just enough to keep it from sticking to your hands.
Gently stretch the surface of the dough on four sides, rotating the ball a quarter-turn as you go. Most of the dusting flour should fall off. You do not want to incorporate this flour into the dough. The bottom of the loaf may appear to be a collection of bunched ends; this is OK.
A correctly shaped loaf will be smooth and cohesive on the top and sides. This whole process should take no longer than 40 seconds. Be careful not to overwork the dough, or the loaves may be dense.
For a very airy (large holes) loaf, let the shaped dough rest (covered with a bowl) for 1 hour to 1 ½ hours. Otherwise, let dough rest, uncovered, for about 40 minutes.
Meanwhile, adjust oven racks to the middle and lower positions. Place a baking stone on the center rack. Place an empty metal pan on the lower rack. Heat oven to 450 degrees.
Liberally dust the top of the dough with flour, then, using a serrated knife, cut ½ -inch-deep slashes in a cross, scallop or tic-tac-toe pattern across the top. Slide the loaf (if using parchment paper you can simply lift the loaf and transfer it with the paper to the stone) to the baking stone. Quickly, but carefully, pour 1 cup of hot tap water into the metal pan (if your oven has a window in the door be extra careful not to drip any water on it). Quickly close the oven door to trap the steam. If you used parchment paper instead of cornmeal, remove the parchment by pulling it from under the loaf after about 20 minutes for a crisper bottom crust. Bake for a total of 30 to 35 minutes, or until the crust is richly brown and firm to the touch. When you remove the loaf from the oven, a properly baked loaf will crackle or “sing” when initially exposed to the cooler air of the room. Cool loaf on a wire rack for 2 hours before slicing.
Makes enough dough for 4 (almost 1-pound) loaves.
Note: We substituted 1 ½ cups white whole-wheat flour with very good results.
Variations:
Herb bread: Add 1 ½ teaspoons of your favorite dried herb blend to the water mixture.
Sandwich loaf: Use a 2-pound ball of dough and elongate dough ball and place in a well-greased 8 ½ -by-4 ¼ - inch loaf pan. Let rise, covered loosely with plastic wrap, for 90 minutes. Bake as directed for 45 minutes or until brown and firm. Remove from pan and cool completely on a wire rack before slicing.
Recipe adapted from The New Artisan Bread in Five Minutes a Day by Jeff Hertzberg and Zoe Francois
Rye-Ale Bread
¼ cup warm water
2 ¼ teaspoons active dry yeast
1 cup ale, heated to 110 to 120 degrees
2 tablespoons molasses
2 tablespoons olive oil, plus more for coating
1 teaspoon salt
1 teaspoon caraway seed, optional
2 cups all-purpose flour, plus more for dusting
¾ cup rye flour
Cornmeal, for dusting
In a large bowl, stir together the warm water and yeast. Let stand until yeast dissolves, about 5 minutes. Stir in the ale, molasses, olive oil, salt and caraway seed (if using). Stir in flours. Dough will be somewhat sticky.
Lightly coat a large bowl with olive oil. Transfer dough to oiled bowl. Cover with plastic wrap. Refrigerate dough 4 to 24 hours.
Lightly dust a work surface with flour.
Gently scrape dough from bowl onto a floured surface.
Cover with plastic wrap (you may wish to coat plastic wrap with oil or cooking spray to prevent its sticking to dough) or a tea towel dusted with flour and let stand 30 minutes.
Lightly dust a baking sheet or pizza stone with cornmeal.
Gently shape dough into desired loaf and place it on the prepared baking sheet. Cover and let rise about 1 hour.
Toward the end of rising, heat oven to 400 degrees.
Bake loaf 25 minutes or until bread is golden brown and the internal temperature reaches 200 degrees.
Cool completely on a wire rack.
Makes 1 loaf.
This recipe for gluten-free cheddar bread is “as good as it gets,” according to gluten-free cook Erika Gray.
Gray suggests enjoying the bread within two days of baking or freezing because it will dry out very quickly.
“The upside is a dry loaf readily reduces down to breadcrumbs for later,” she says.
Gluten-Free Cheddar Cheese Bread
2 tablespoons ground chia seeds
2 ¼ teaspoons active dry yeast
1 tablespoon granulated sugar
1 ¾ cups whole milk heated to 110 degrees, divided use
1 ½ cups brown rice flour
½ cup millet flour
½ cup tapioca flour
½ cup cornstarch
¼ cup nonfat milk powder
1 teaspoon unflavored gelatin OR agar powder
1 ½ teaspoons xanthan gum
½ teaspoon salt
3 eggs, at room temperature
4 tablespoons unsalted butter, melted and cooled to room temperature
6 ounces grated sharp cheddar cheese, divided use
Coat 2 (8 ½ -by-4 ½ -inch) loaf pans with vegetable oil spray.
Combine the chia seeds, yeast, sugar and 1 cup of the warm milk in the bowl of a stand mixer fitted with the paddle attachment. Let stand 10 minutes.
Combine the rice flour, millet flour, tapioca flour, cornstarch, milk powder, gelatin, xanthan gum and salt in a separate mixing bowl and mix well.
When the yeast is frothy, add the remaining milk, the eggs and melted butter and mix well. Add the rice flour mixture and beat at medium speed until combined. Increase speed to high and beat the dough for 3 to 5 minutes or until it has the consistency of a thick but pourable cake batter. Stir in 1 ½ cups of the cheese.
Scrape dough into the prepared pans and smooth the top with a rubber spatula dipped in water and cover the pans with a sheet of oiled plastic wrap or a damp tea towel. Allow loaves to rise for 40 to 50 minutes or until it reaches ½ inch from the top of the pan. Sprinkle the loaves with the remaining cheese.
Meanwhile, heat oven to 375 degrees.
Bake loaves for 30 minutes.
Loosely cover the loaves with foil and continue baking 20 to 25 minutes more or until bread is golden brown and sounds hollow when tapped on the bottom or until the internal temperature reaches 195 degrees.
Cool loaves in pans for 30 minutes, then remove from pans and cool completely.
Makes 2 loaves.
Recipe adapted from Gluten-Free Bread: More than 100 Artisan Loaves for a Healthier Life by Ellen Brown
Food, Pages 31 on 02/26/2014