My earliest memories of my mother revolve around cooking.

As soon as my older sisters left for school and the house had been tidied, Mom and I were in the kitchen, preparing for the evening’s dinner, which almost always included a homemade dessert. She bustled around, gathering the ingredients for a devil’s food cake, sifting together flour and cocoa, cracking eggs on the side of the bowl, while I sat on the counter watching the chocolate concoction whirling in the mixer. Of course I would have a chance for a taste of the batter from the beaters or the bowl. But as anyone who knew Margaret Armstrong Ballard knows, there was very little left by the time she scraped the last of the mixture into the baking pans. She was a child of the Depression, after all.
As the years passed and I grew up and moved away, we always reconnected in the kitchen when I came home. I watched her, as I had from the beginning, and slowly started to learn to make her version of the dishes she was famous for in certain circles: Truly Candied Yams, Basmati Rice and Broccoli Casserole, and, in the end, her incredibly simple (but almost impossible to reproduce) sourdough biscuits, simply known in our family as “Mamaw’s Biscuits.”
Even though she was a country girl who was born and raised in Cleveland County, and (in her words) “grew up on beans and fried potatoes,” my mother was surprisingly adventurous in the kitchen.
When Dad was stationed in El Paso, Texas, during World War II and they lived in an apartment next to a Mexican couple, Mother learned from her new friend how to make tacos from scratch, hand-frying the fresh corn tortillas and spicing the ground beef with homemade enchilada sauce. Growing up in Little Rock, we had tacos for dinner every Friday night for many, many years,long before Tex-Mex was commonplace on Arkansas’ culinary landscape. I can still see her standing over the stove, carefully folding and deep-frying the tortillas, then filling them with seasoned ground beef, chopped onions, cheese, lettuce and tomatoes while we waited hungrily for the next batch. They are still the best tacos I have ever eaten.
In 1957, my dad bought Mom The American Woman’s Cookbook, which started her on a culinary adventure that would last decades.
She worked her way through the book, finding delightfully different dishes to try out on us, including a hearty English dish called “Roast Beef With Yorkshire Pudding” that became a staple for special dinners.
In 2008 Mom passed that book down to me, much worse for the many years of wear, the front cover missing, heavy tape covering the spine in an attempt to keep the back cover attached. Ever the one to keep historical records, she attached a yellow sticky-note inside the front page: “Margaret from Marion 1957.
To Rebecca September 2008.” As I leafed through the cookbook the other day I could see from the smudges and splatters on certain pages which of the recipes she had made over and over, and in leafing through that book, I realized that I was leafing through my early childhood: all the meals, all the warmth, all the love.
Grandchildren and then great-grandchildren have since had the pleasure of sitting on Mamaw’s counter while she made biscuits or cornbread, pie crust or cake. I think of how lucky we all are to have grown up in the presence of Margaret, in her kitchen.
Still hanging in that kitchen is a sign that my mother’s sister gave to her in jest, years ago: “Margaret is the boss of this Kitchen,” it reads.
“If you don’t believe it, start something!” Margaret was always the boss of her kitchen, and though she has been gone from our lives for almost two years, I think it is safe to say that she’s still the boss of mine too. I never cook that I don’t feel her presence, looking over my shoulder, making sure that I scrape every bit of the cake batter from the bowl.
The special part of this favorite is the fluffy Yorkshire Pudding, which is baked to a crispy golden brown and served alongside the meat.
Mom paired it with roasted potatoes and gravy for a hearty and delicious meal that never failed to please her guests.
Roast Beef With Yorkshire Pudding
1 beef roast
Salt and ground black pepper
Fresh garlic, chopped, optional
Sliced bacon, optional
Heat oven to 300 degrees.
Wipe roast with damp cloth but do not wash. Rub with salt in proportion of 1 teaspoon per pound of meat. Rub with pepper and fresh chopped garlic, if desired. Place meat, fat side up, on a rack in a roasting pan. If the meat has little or no fat, place strips of bacon or salt pork over it. This will baste the roast and no other basting is needed. Do not add water and do not cover pan. Roast at 300 degrees for 22 minutes per pound for rare, 25 minutes per pound for medium or 30 minutes per pound for well done. The roast will continue cooking for 30 minutes or so after it is removed from the oven.
Yorkshire Pudding
1 cup sifted all-purpose flour
½ teaspoon salt
1 cup milk
2 eggs
Hot pan drippings from roast
Place a shallow, metal pan in the oven to heat.
In a mixing bowl, combine flour and salt.
In a separate bowl, whisk together the milk and eggs. Add to flour mixture and beat until smooth.
Remove heated metal pan from oven. Add enough hot drippings from the roast to the metal pan to fill by 1 inch.
Quickly pour batter into pan with drippings. Return to oven and bake at 400 degrees for 30 minutes.
The pudding may then be placed under the rack holding the roast beef and left for 15 minutes to catch the juices from the roast. If a rack is not used, cut pudding into squares and arrange in pan around roast.
Serve with the meat.
Note: Mixture can also be baked in muffin tins, resulting in individual puddings.
Recipes from The American Woman’s Cookbook edited and revised by Ruth Berolzheimer (Garden City Publishing Co. Inc., Garden City, N.Y., 1957)
This dish has been a part of our Thanksgiving and Christmas dinners since childhood. Because the sweet potatoes are only lightly blanched and then finish cooking in the syrup, they are truly candied and the consistency and taste are remarkable. Learning to make them is a bit of a process, and the process requires patience, but the end result is its own reward.
Mom’s Truly Candied Yams
12 large sweet potatoes
1 cup granulated sugar
1 cup brown sugar
½ cup (1 stick) butter
1 teaspoon vanilla extract
Heat oven to 350 degrees.
Peel the sweet potatoes and quarter them lengthwise into pieces of approximately the same size. Place in a large pot and add enough cold water to cover. Bring to a boil and boil 1 minute. Immediately remove from heat and pour the sweet potatoes into a colander to drain.
Meanwhile, stir together the sugars with ¼ cup water in a heavy sauce pan. Bring mixture to a boil, stirring frequently, until the liquid turns to syrup and the sugar begins to crystallize on the sides of the pan. Remove from heat, add butter and vanilla and stir until blended.
Layer the blanched sweet potatoes in a large casserole dish and pour the syrup over them, scraping the sides of the saucepan to free the crystallized sugar. Bake, covered with foil, basting occasionally, until sweet potatoes are tender and all of the syrup has been absorbed.
(Baking time varies.)
Makes about 12 servings.
Mother often served this cool, crisp salad as a side dish, as it is meant to be prepared in advance and served thoroughly chilled.
7-Layer Salad
1 head of lettuce, torn into bite-size pieces
1 cup sliced celery
½ cup sliced green onions
1 (10-ounce) package frozen tiny peas, thawed but not cooked
1 to 1 ½ cups mayonnaise (or enough to cover the peas)
1 (2.8-ounce) jar Hormel Real Bacon Bits
Grated parmesan cheese
In a large, deep serving bowl (preferably clear glass) layer the ingredients in the order listed. Refrigerate until well chilled before serving.
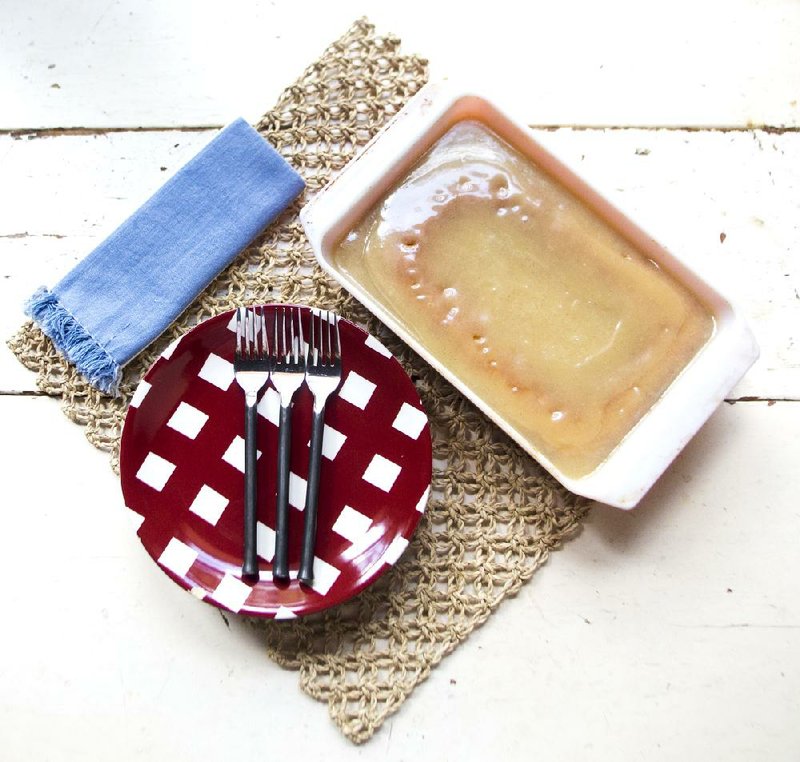
My mother came from a time when telephones were rare and guests had no way to call ahead to announce their arrival. They would simply stop by. Mom loved unexpected company and this was one of her go-to desserts, whether she had time to plan ahead or not. This simple but delicious cake could literally be “stirred up” in a matter of minutes and served to guests warm out of the oven.
While it’s at its best when served warm, it’s delicious at room temperature as well. It also makes a great plain yellow cake base to be served with strawberries and whipped cream, or frosted with cream frosting.
Margaret’s Country Cake
2 cups self-rising flour
2 cups granulated sugar
1 cup cooking oil
1 cup milk
3 eggs
1 ½ teaspoons vanilla extract
Heat oven to 350 degrees.
Grease and flour a 9-by-13-inch glass baking dish.
Place all ingredients into a large mixing bowl and mix well by hand. Pour into prepared baking dish. Bake 35 to 45 minutes, until cake top is lightly browned. Remove from oven and immediately prepare the icing.
Country Cake Icing
1 ½ cups granulated sugar
1 ½ tablespoons all-purpose flour
1 (5-ounce) can evaporated milk
½ cup (1 stick) butter or margarine
1 teaspoon vanilla extract
Stir sugar, flour and milk together in a saucepan, add butter and bring mixture to a rolling boil over medium heat, stirring to avoid sticking.
Remove from heat and stir in vanilla.
Poke several holes in the cake with the handle of a spoon or fork and pour warm icing over the surface of the cake, making sure it seeps into the holes.
This is the approximation of a recipe for my mother’s most famous culinary accomplishment: her biscuits. She baked them every day for breakfast for as long as I can remember, much to the delight of her grandchildren and great-grandchildren. Containing only two ingredients - self-rising flour and buttermilk - the devil is in the details when it comes to making these unique biscuits.
I have modified her original technique - which consisted of starting with a large shallow bowl full of flour, pouring buttermilk into the middle, and folding the flour into the buttermilk from the edges (as she turned the bowl) until it formed a ball of dough that was the perfect consistency. It was a wonder to watch, but, in the end, impossible to duplicate.
Here is my version, and I’ve been told that the resulting biscuits are (almost) as good as hers. (Measurements are approximate.)
Mamaw’s Biscuits
3 ½ cups good quality self rising flour, divided use, plus more as needed
2 ¼ cups whole-fat Bulgarian buttermilk
Vegetable oil for coating pan (and hands)
Heat oven to 425 degrees.
Place 3 cups flour in a mixing bowl, pour buttermilk on top and gently fold the flour into the milk with a spatula just until the milk is absorbed. Do not over stir. The dough should resemble a very thick batter.
Sprinkle approximately ½ cup of flour in a large, shallow, stainless steel bowl and transfer the dough to the bowl, on top of the flour. (It will be necessary to oil your hands when handling the dough.) Sprinkle a small amount of flour on top of the dough and begin folding in the edges of the dough with your fingers as you turn the bowl, capturing some of the flour underneath and folding in the flour sprinkled on top. (There will be loose flour left in the bottom of the bowl - no need to use it all.) The end result should be a ball of fluffy dough that loosely holds together.
Transfer the dough to an airtight Tupperware-type container that has been lightly oiled. Pinch off biscuit dough to desired size (slightly larger than a golf ball), flatten slightly and place in round, oiled biscuit pan, filling the pan with biscuits with sides touching. Pat top of biscuits with oil to aid in browning. Bake in hot oven for 15 to 20 minutes, or until biscuits are golden brown.
Refrigerate the remaining dough in the airtight container and bake biscuits daily as needed. The dough will last for a few days in the refrigerator.
Some in our family prefer the biscuits when they’re freshly made (light and fluffy) and others prefer the slightly tougher sourdough version that results from a couple of days in the fridge.
Food, Pages 31 on 08/28/2013