LITTLE ROCK — So you think you want to be a cowboy? You’ve listened to all the sad country songs you can find.
You’ve bought a pickup, been to the rodeo and even practiced hollering, “Yeehaw.” Heck, you’re pretty sure you could ride a horse and rope a calf, given the chance.
Well, hold your horses there, pardner. Roping is much more complicated than it looks.
“You can’t just go, get on a horse and try to rope a calf,” says former saddle bronc rider Rick Whorton of Springdale, a lifelong roper.
Whorton, a former member of the Professional Rodeo Cowboys Association, says most ropers spend quite a bit of time practicing on inanimate objects before they ever mount up and try to catch a live animal.
Though it’s now primarily a rodeo sport, roping was a necessary skill-set in the 19th and early 20th centuries, when cowboys needed to catch cattle and brand them to ward off rustlers.
“Back then, there was just the open range - you didn’t have fences, so they had to rope the calf in order to get their hands on him,” says Whorton, who retired in 1985 after being on the circuit 10 years.
Today there are calf roping and team roping events for all ages. “It’s a lifetime sport,” says Whorton, 57, who still ropes for fun. “They have ropings for beginners - meaning little kids. Then, it goes to junior high, high school, college, professional. They even having roping for old guys like me.”
But that doesn’t mean you have to be young to start roping. In fact, you can start at any age - with a few simple tools.
A ROPE AND ...
Basic roping starts with a rope and a roping dummy.
Grass is out.
It might seem easy enough to go to Ace Hardware or Lowe’s and buy any old rope to start with, but professional ropers prefer specific ropes. Once upon a time, ropers used grass ropes made of manila to tie up calves, but too often those ropes broke.
How long?
Individual ropers use polyester or poly-grass blend ropes measuring 28 to 30 feet in length, while team ropers prefer nylon ropes measuring 30 to 36 feet. Both types of rope come with a “honda” or “hondo” - an eyelet - on one end that will allow you to make a loop for your lasso.
A horn knot is also required.
Ropers can buy a small, rubberband-like piece of material to create this loop, which secures the rope to a rider’s saddle, instead of tying it themselves, Whorton says.
Getting hogtied.
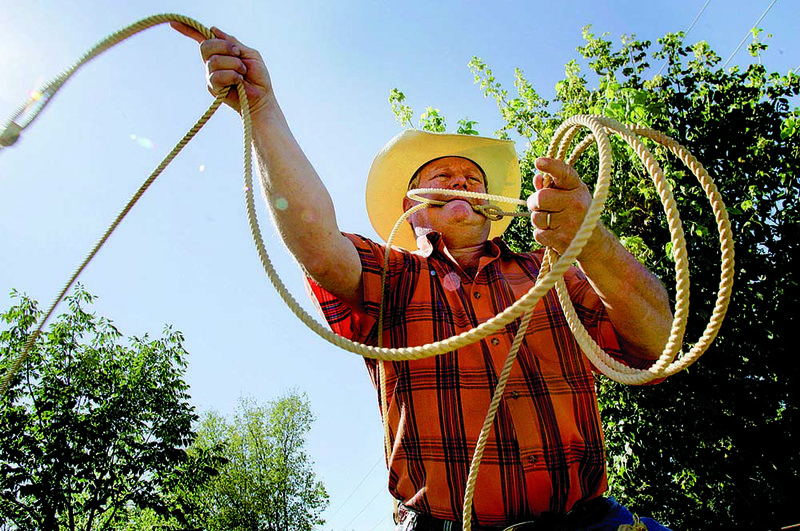
Professional ropers and weekend amateurs also carry what’s called a pigging string, which is a skinnier, 6-foot rope used to hogtie a calf. It, too, has a honda and a loop at the end. Rodeo riders typically carry this in their teeth with the end tucked into their belt loops so that they don’t lose it.
Find something to rope.
A typical roping dummy is made of wood and looks essentially like a cow made of sticks. The would-be roper will stand behind the makeshift animal and try his aim until he perfects it.
What do you do if you don’t have a roping dummy? Any stationary object will do. Whorton says he started roping at age 8 by practicing on a bucket. Fenceposts and mailboxes also make good roping dummies if you’re hard up.
Once you have the basic tools, you can start practicing.
THROW ME A LINE
1. Bring the end of your rope through the honda to create a loop. Make the loop big enough to fit around a calf’s head, but not so big that it becomes unwieldy to swing. The remainder of your rope is called “the slack” or “coils.”
2. Hold the loop in your right hand and the coils in your left. (In a real-life calf roping situation, your reins would also be in your left hand.)
3. Ideally, in a rodeo, the calf would be directly in front of you. So during practice, stand immediately behind your roping dummy as you prepare to throw.
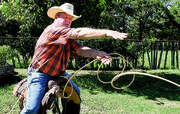
4. Raise your right arm to the side with your elbow bent (for elbow position, imagine a waiter porting a tray overhead) and start to swing the rope. Be sure your elbow is level with your shoulder and your arm isn’t out in front of you. Your wrist, however, should be out in front and doing most of the work.
If you hold your arm so the rope swings too far out in front of you, you won’t be able to throw it very far, Whorton says.
5. Throw the loop at the roping dummy. As you release the loop, let the slack feed through your left hand.
6. Pull the rope so it encircles the dummy and tug with your right hand to tighten it.
RIDING THE RODEO
Once you’ve mastered roping an inanimate object, you’re ready to learn to rope an actual calf. Here are a few tips from Whorton to get you started:
1. Take your time.
Whorton says it took him a number of years to go from roping dummies to roping calves. Be prepared to spend a lot of time practicing before you enter your first rodeo.
2. Be sure your horn knot is secure. Team ropers may slack off, but calf ropers tie down hard and fast, Whorton says. That’s where your horn knot comes in. Tie that end of the rope to your saddle horn until it’s as tight as it can be.
3. Learn to adjust. Spend some time learning how to catch a calf that’s not directly in front of you. You may end up with a calf that’s a little to the right or left, so knowing how to make adjustments is important.
4. Be in it for the long haul. To become even an amateur calf roper, you’re going to need a lot of supplies- everything from a horse trailer and truck to the actual horse and specialized roping saddle. Roping’s an expensive hobby to take up for just a year or two, Whorton says.
ActiveStyle, Pages 25 on 09/24/2012